
Gmail password and 2-step setup
Set a new password, then add a second sign-in step with an authenticator app, a mobile number, or both.
Set your Gmail password
Steps 1 to 7. Sign in, open your Google Account and choose a new password.
Step 1
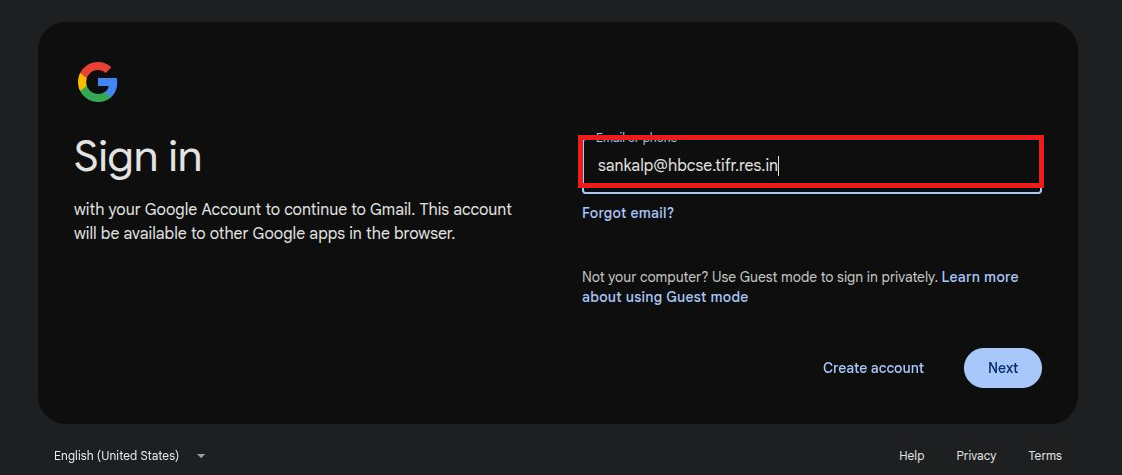
Enter your email address
Go to gmail.com, type in your email address, and click Next.
Step 2
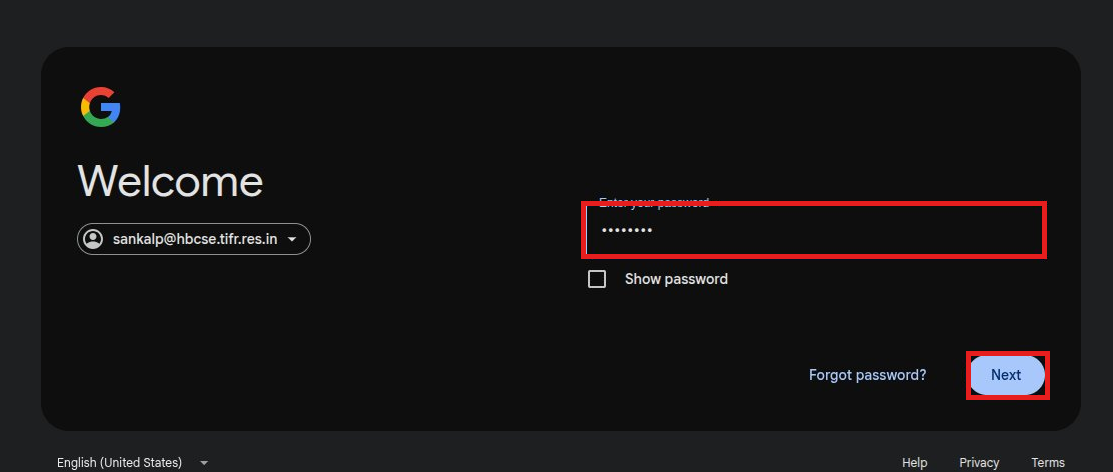
Enter your password
Type your password and click Next.
Step 3
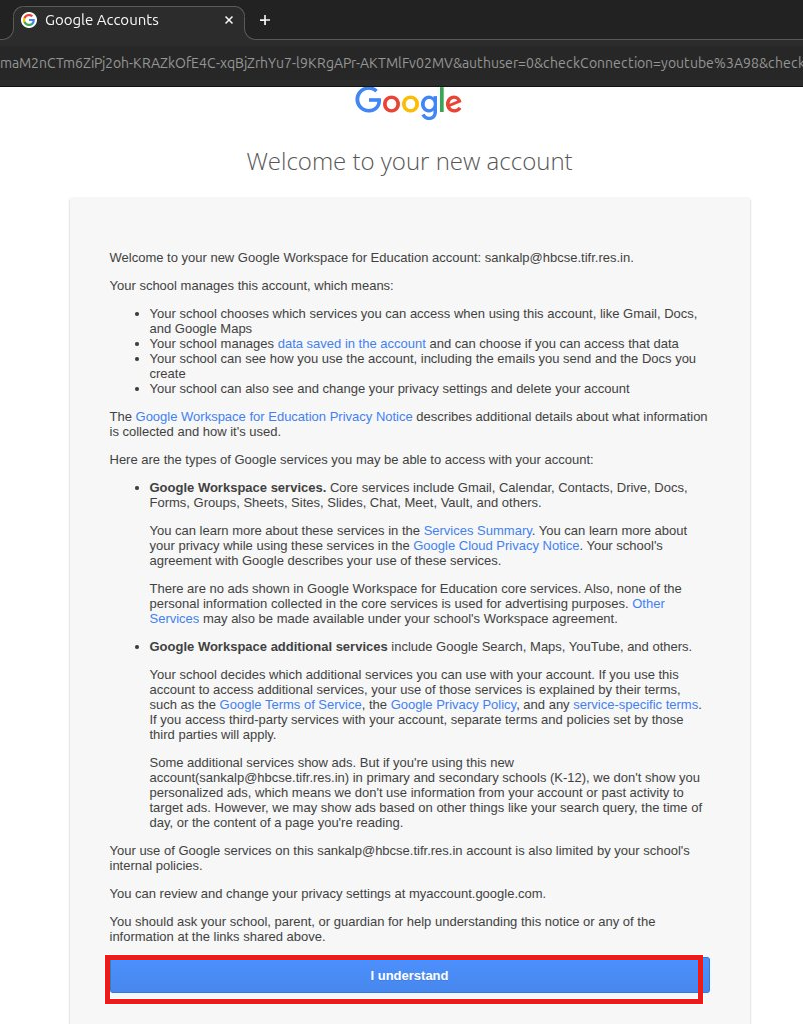
Accept the account notice
Click I understand to continue.
Step 4
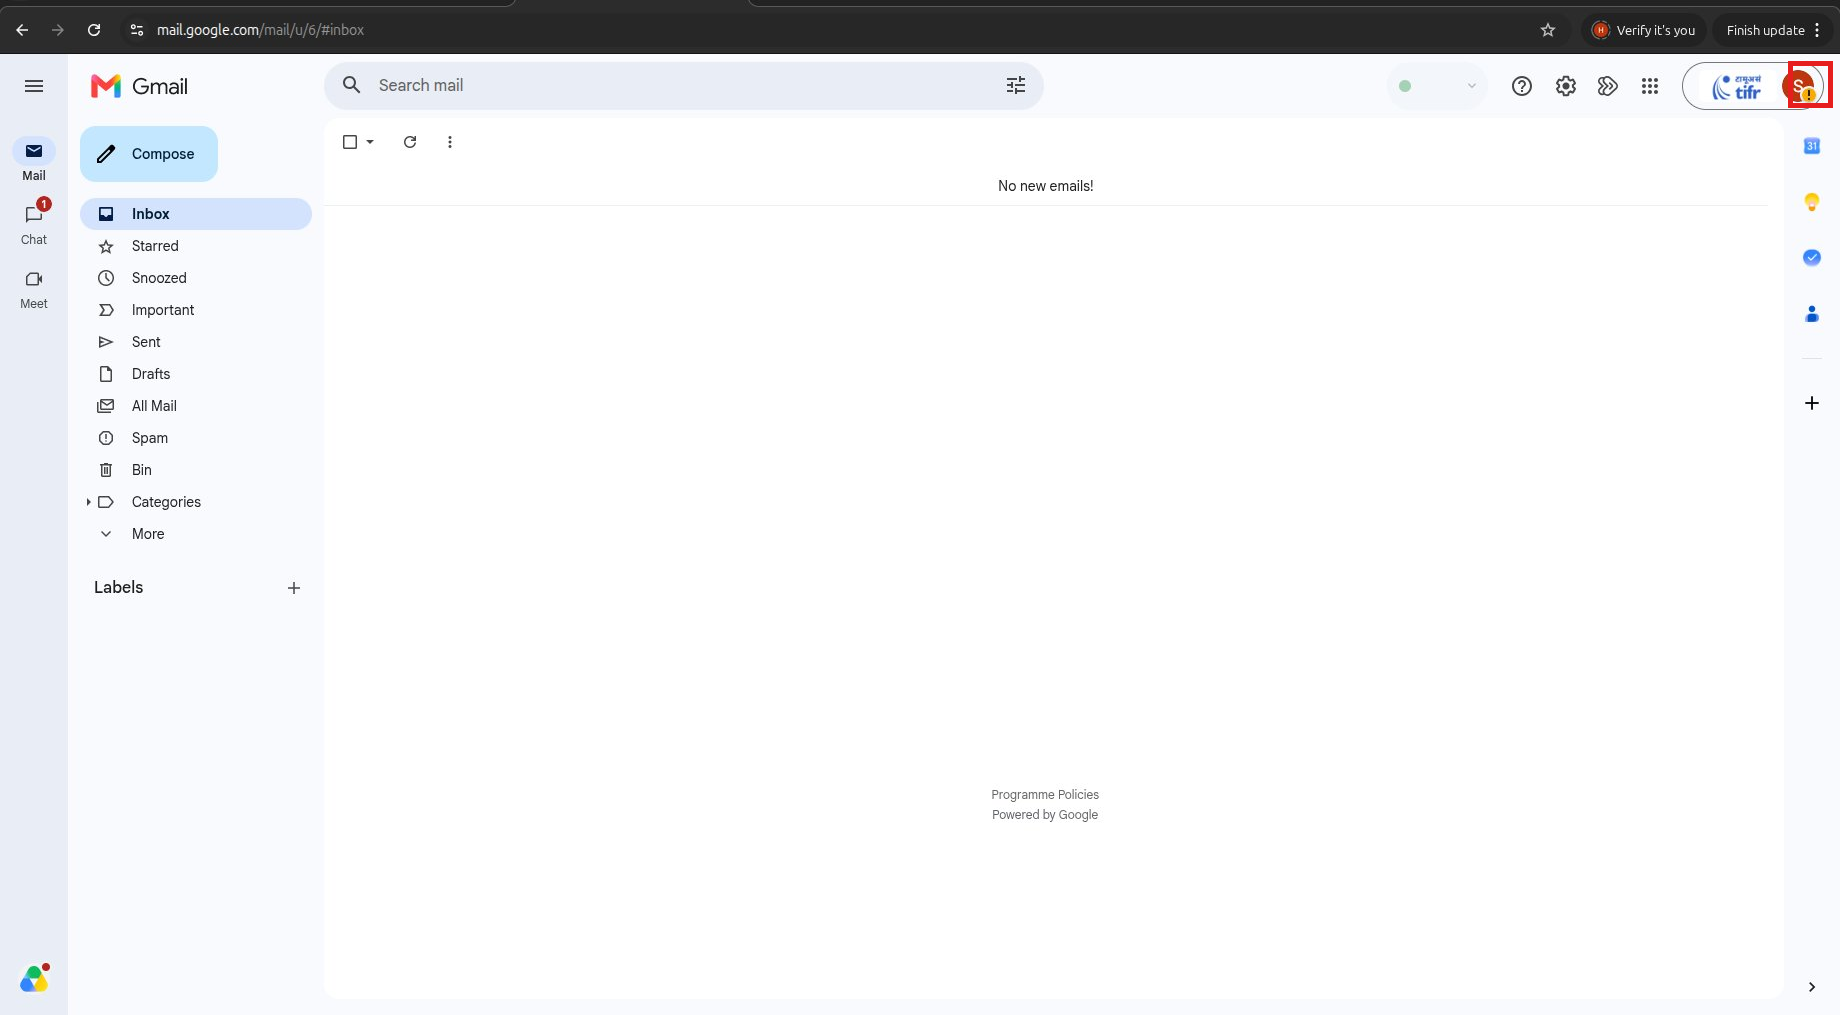
Open the account menu
Once you’re in your inbox, click your profile circle in the top-right corner.
Step 5
Click on Manage your Google Account
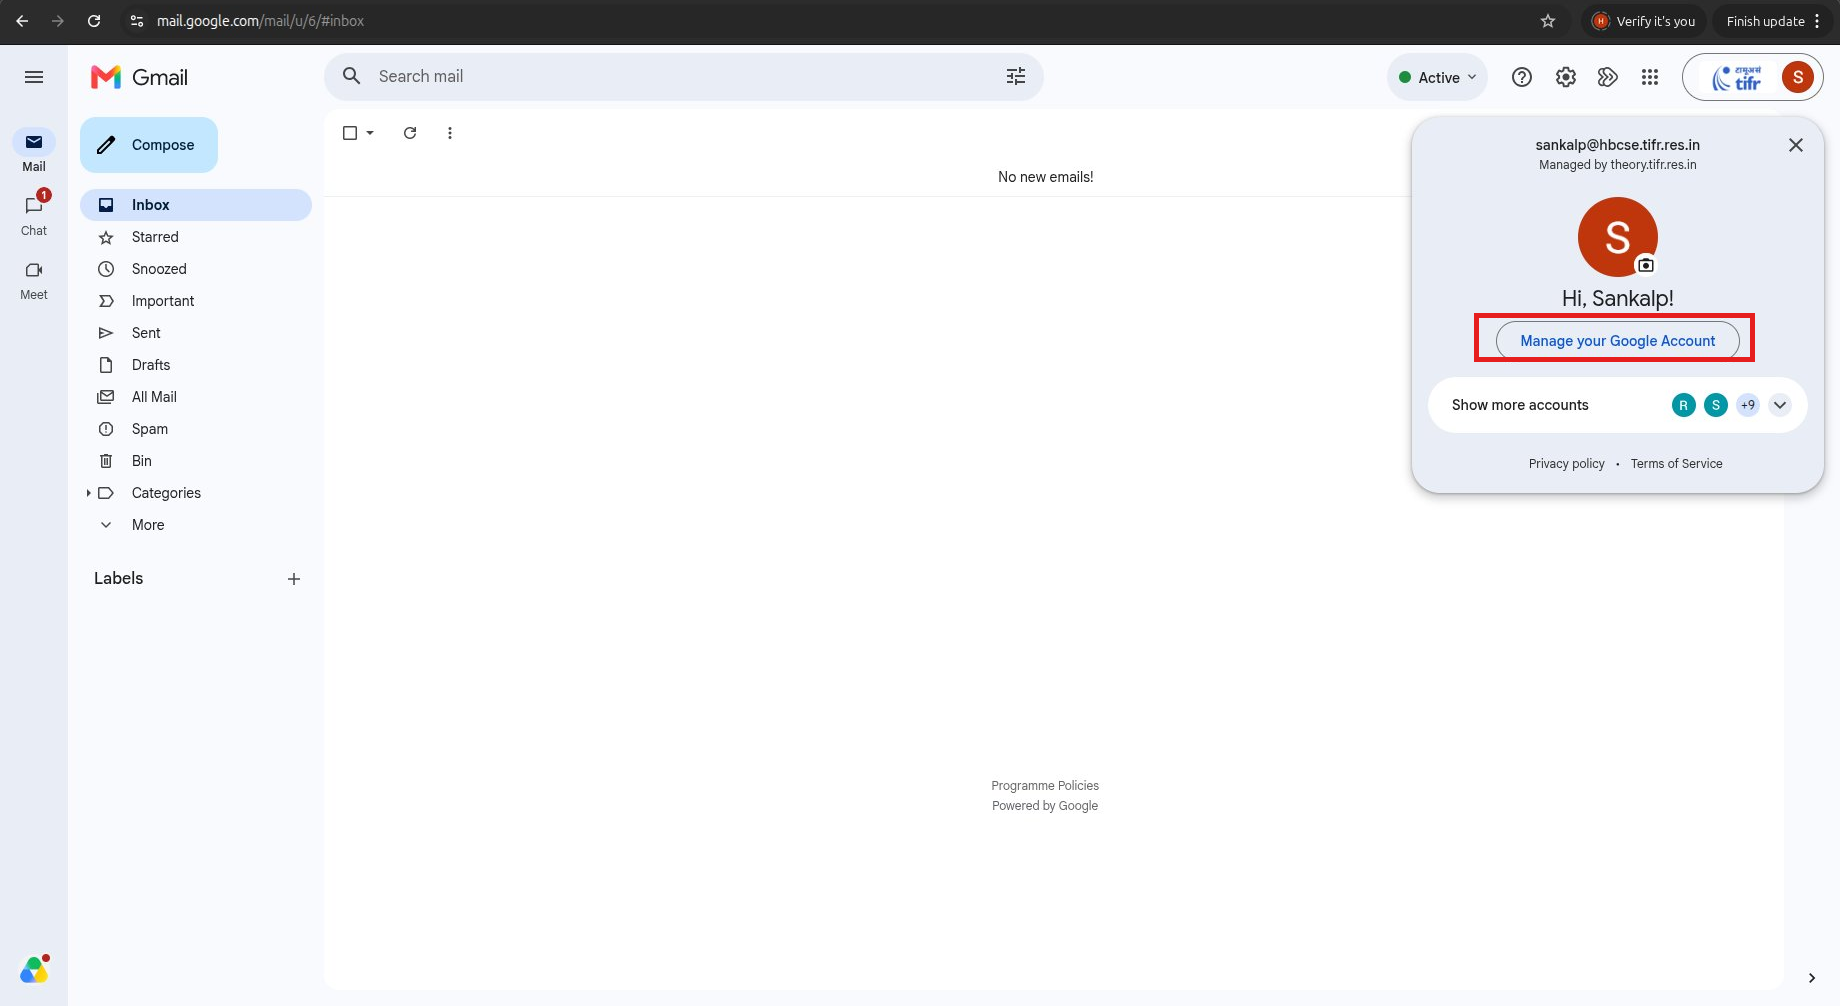
Step 6
Go to Google password
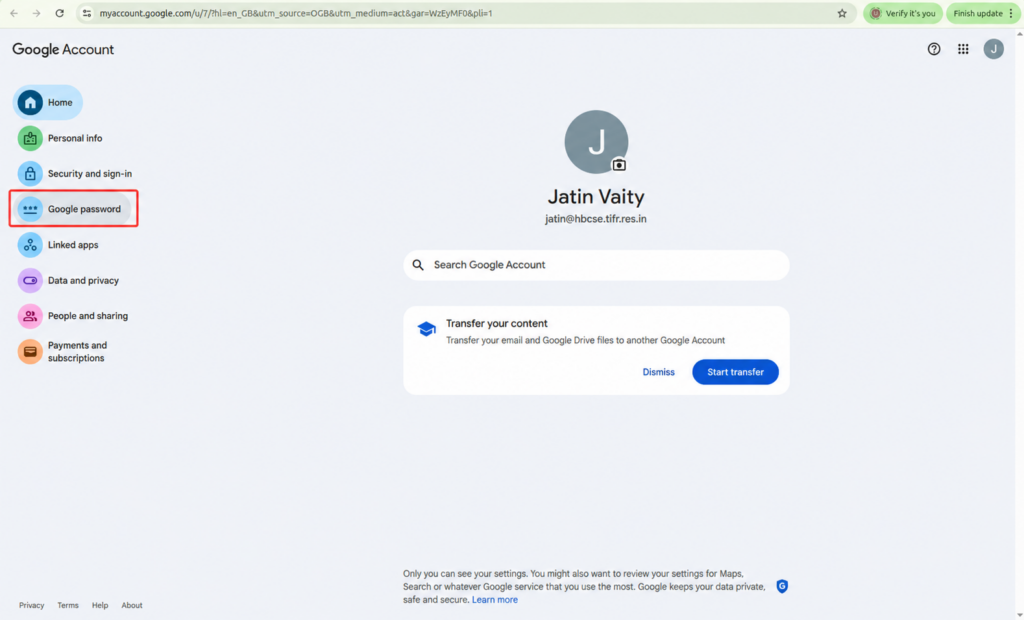
Step 7
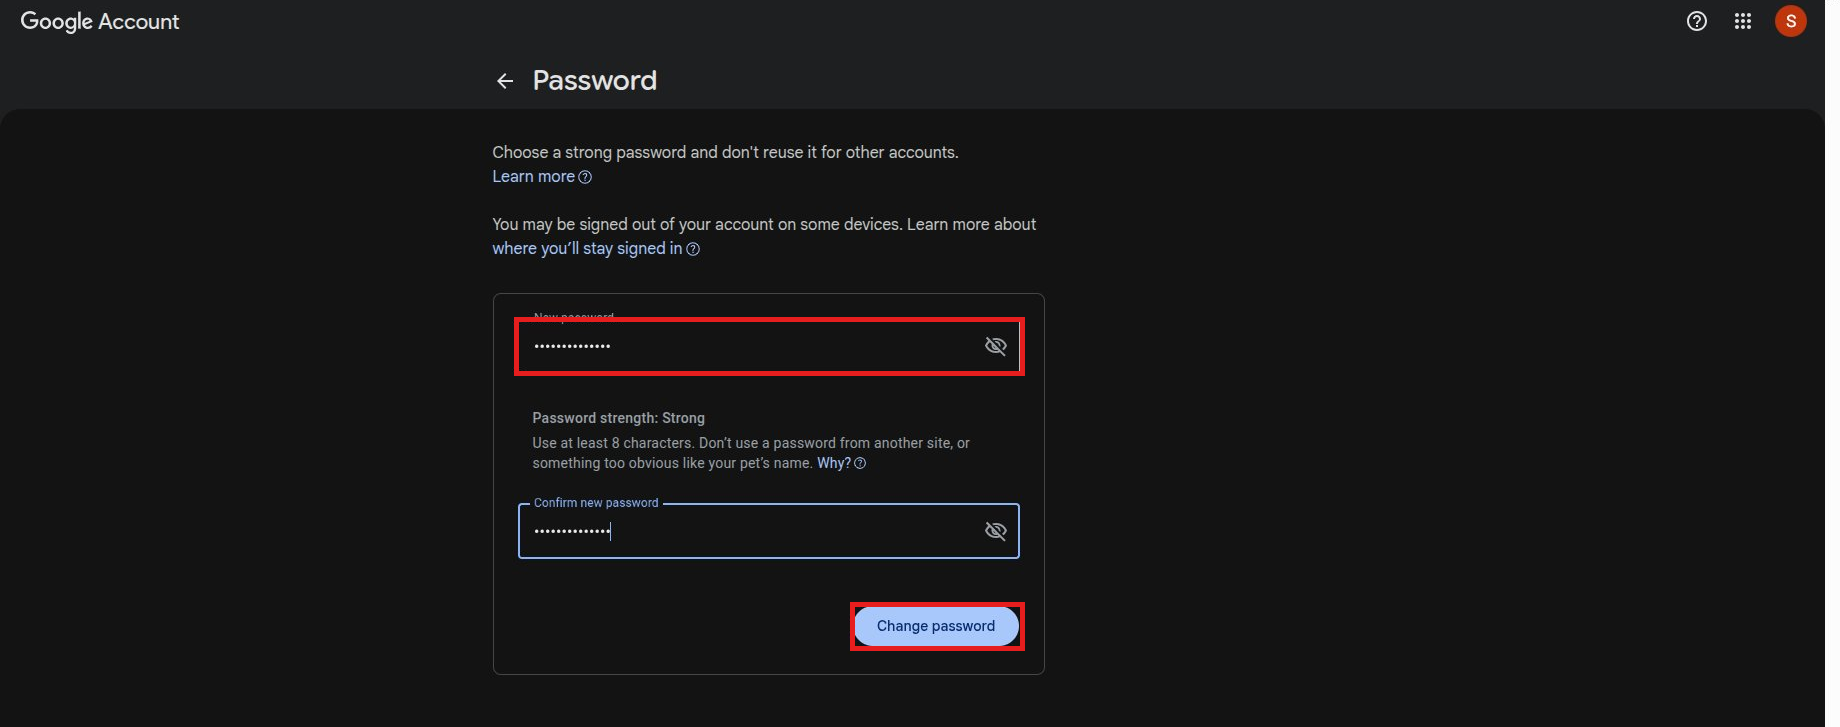
Set a new password
Type a new password into both fields and click Change password.
2-Step Verification: authenticator app
Steps 8 to 16. You can use Google Authenticator, your mobile number, or both.
Step 8
Open the account menu
Once you’re in your inbox, click your profile circle in the top-right corner.
Step 9
Click on Manage your Google Account
Step 10
Go to Security and sign-in
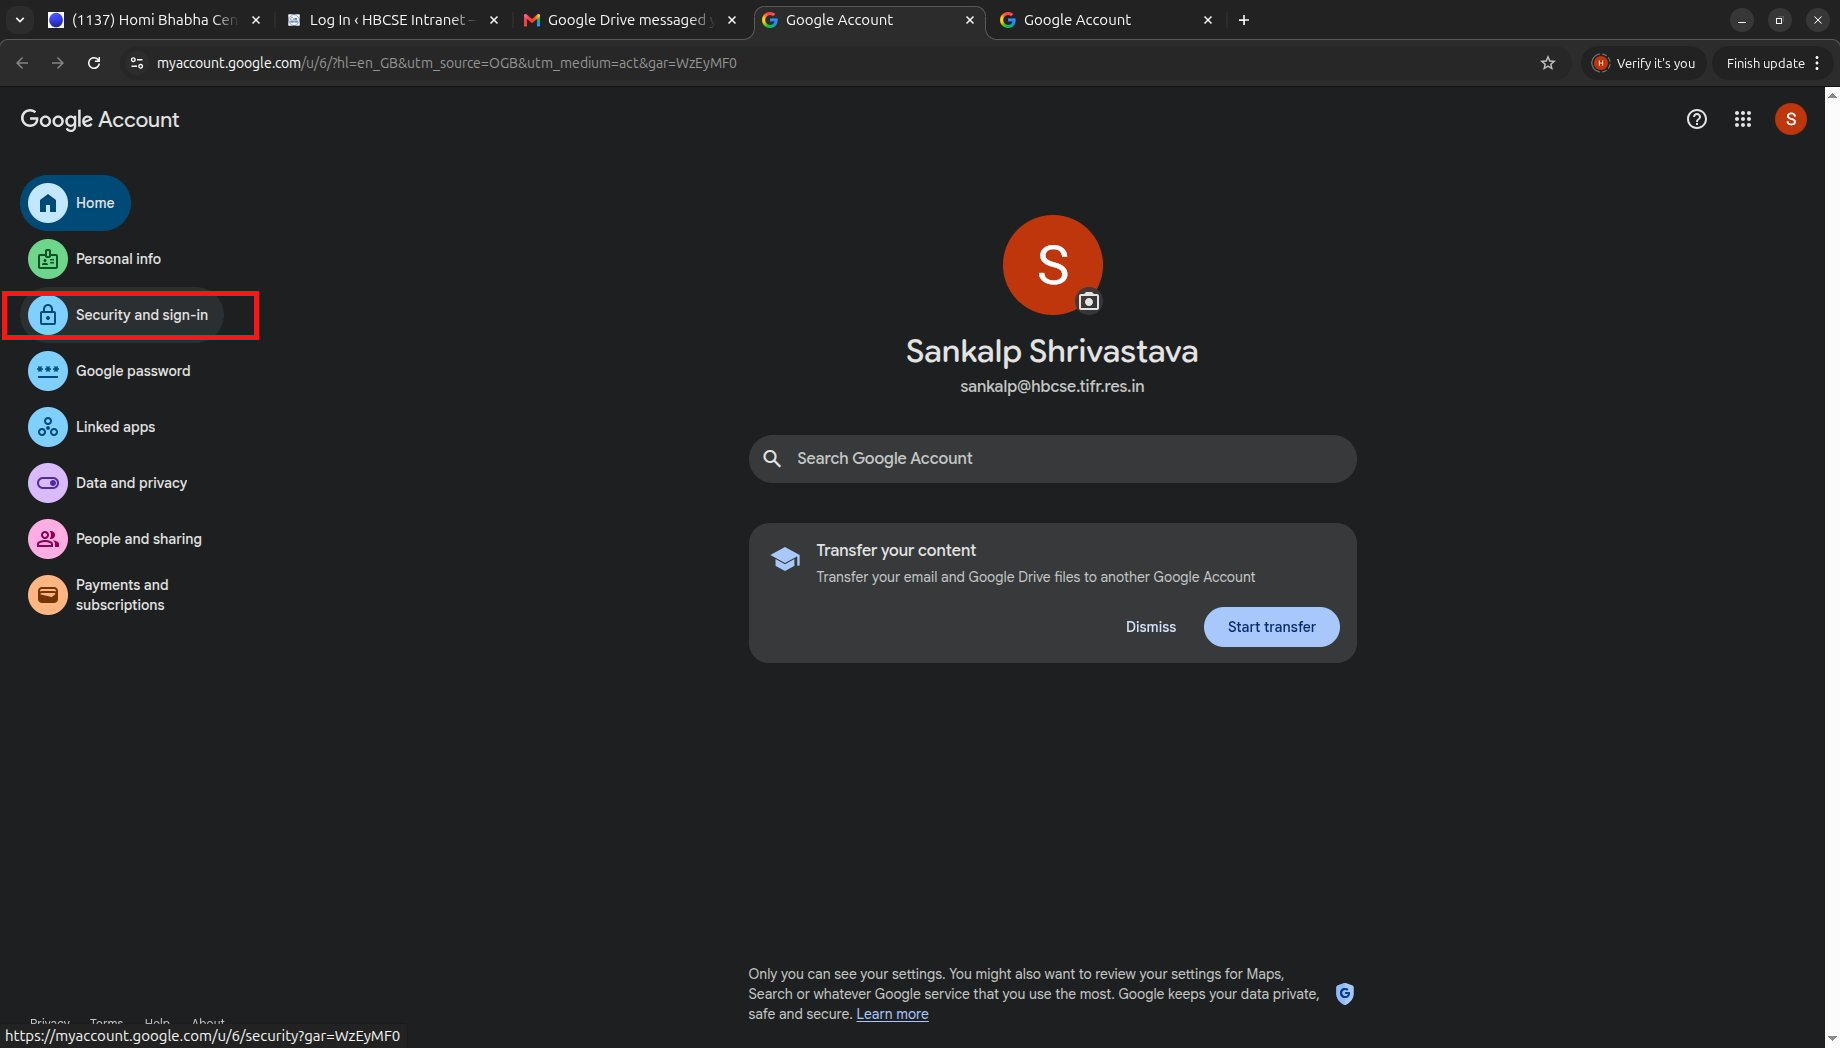
Step 11
Click on 2-Step Verification
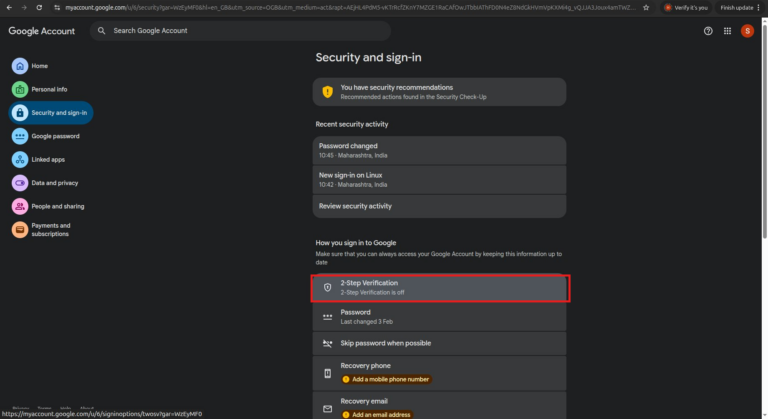
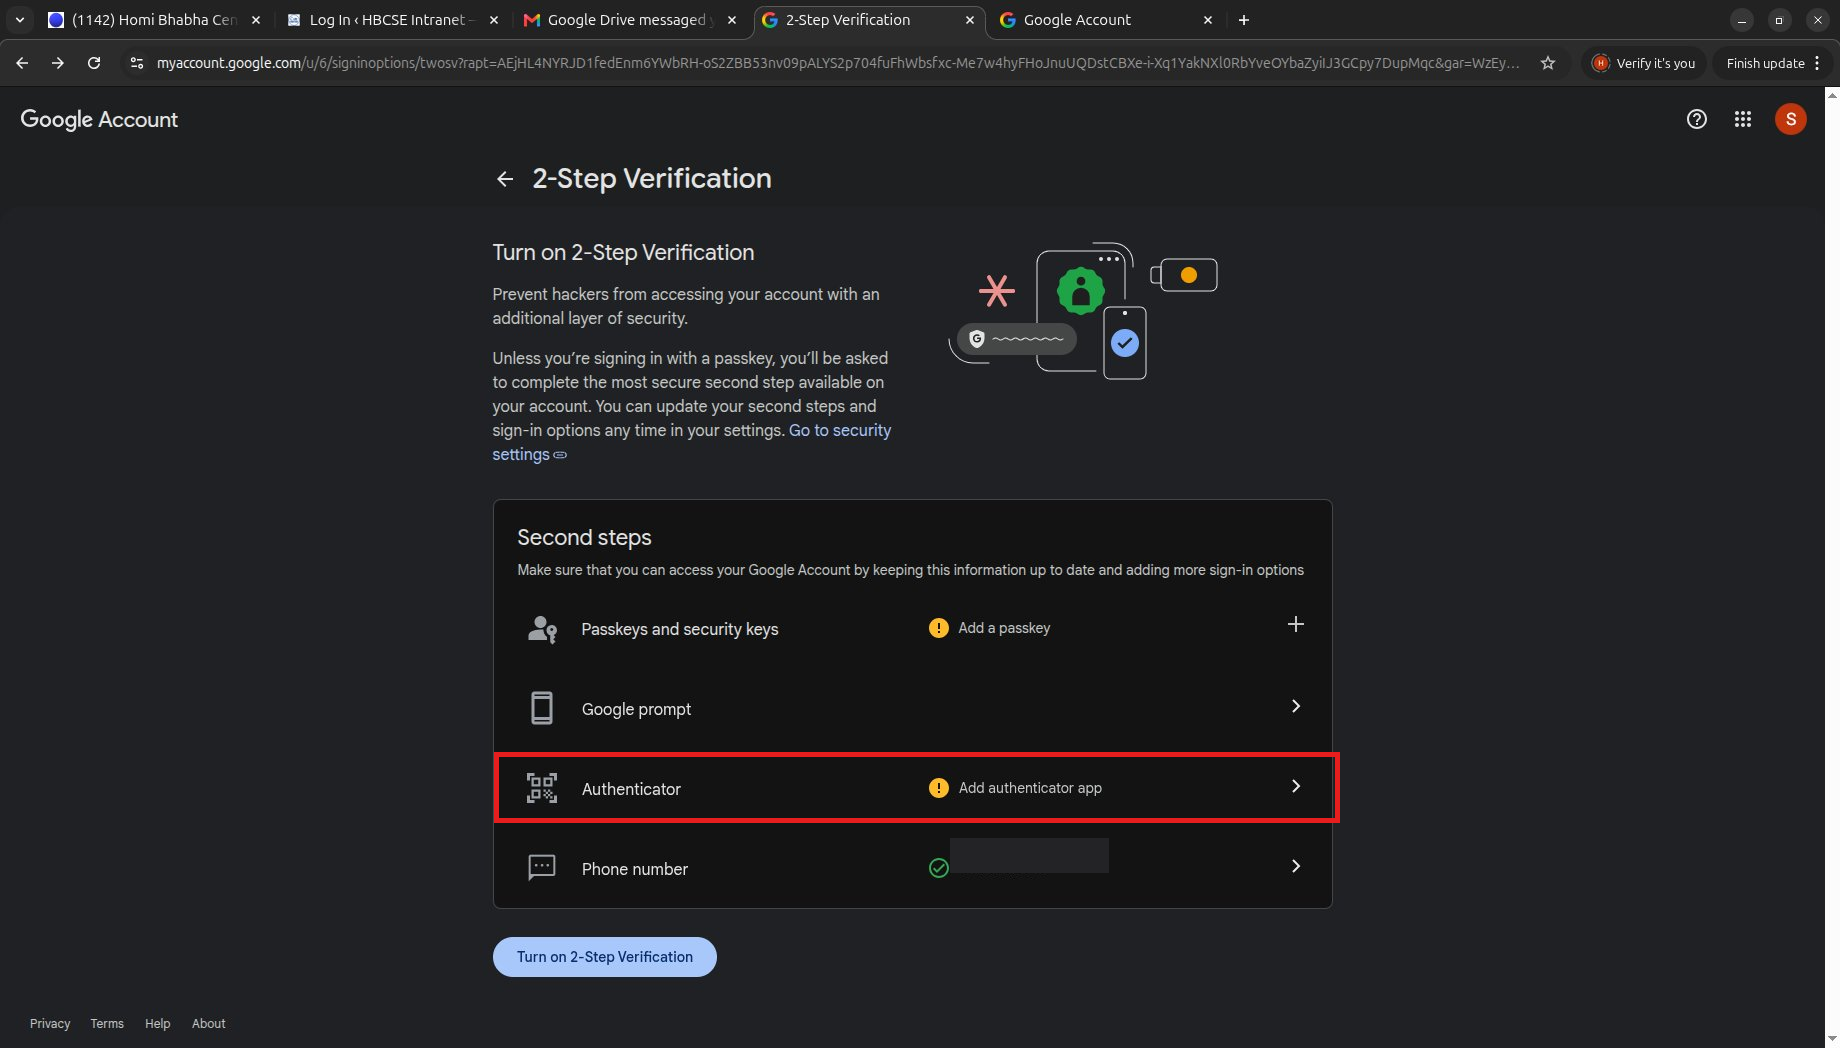
Step 12
Click on the Authenticator app
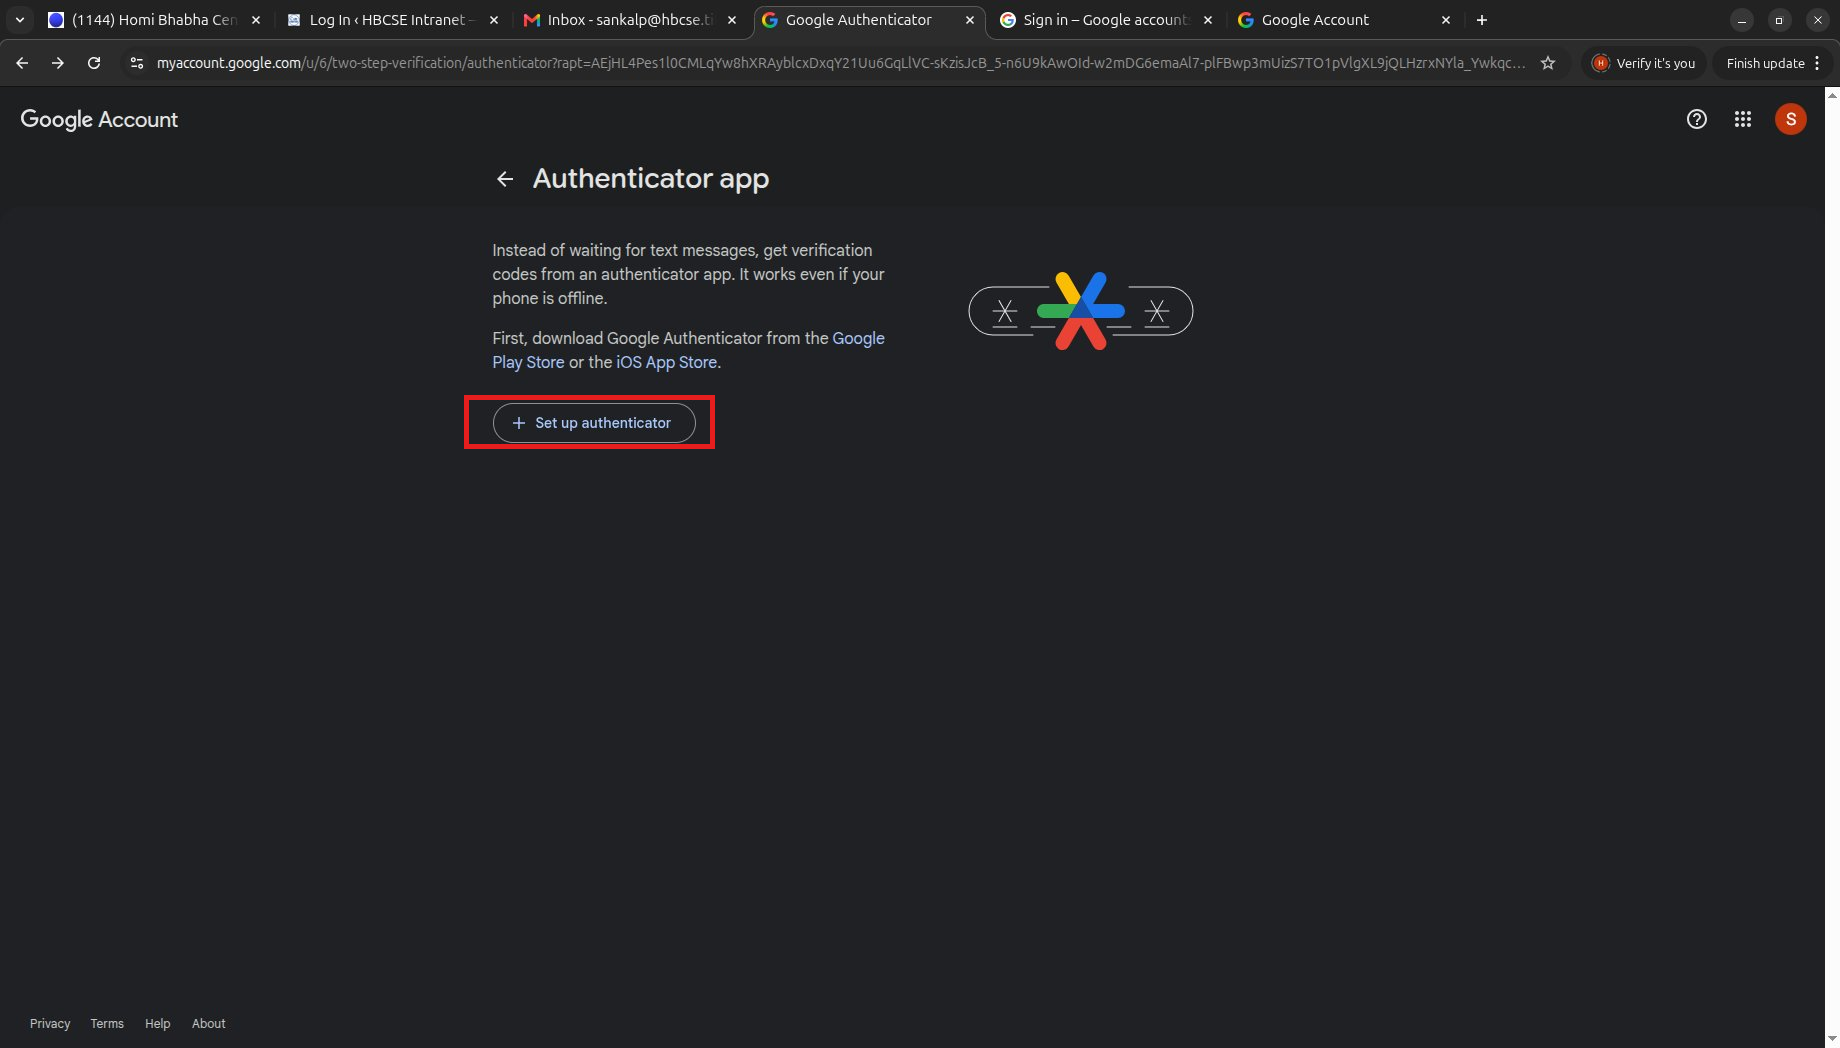
Step 13
Start the authenticator setup
Click Set up authenticator.
Step 14
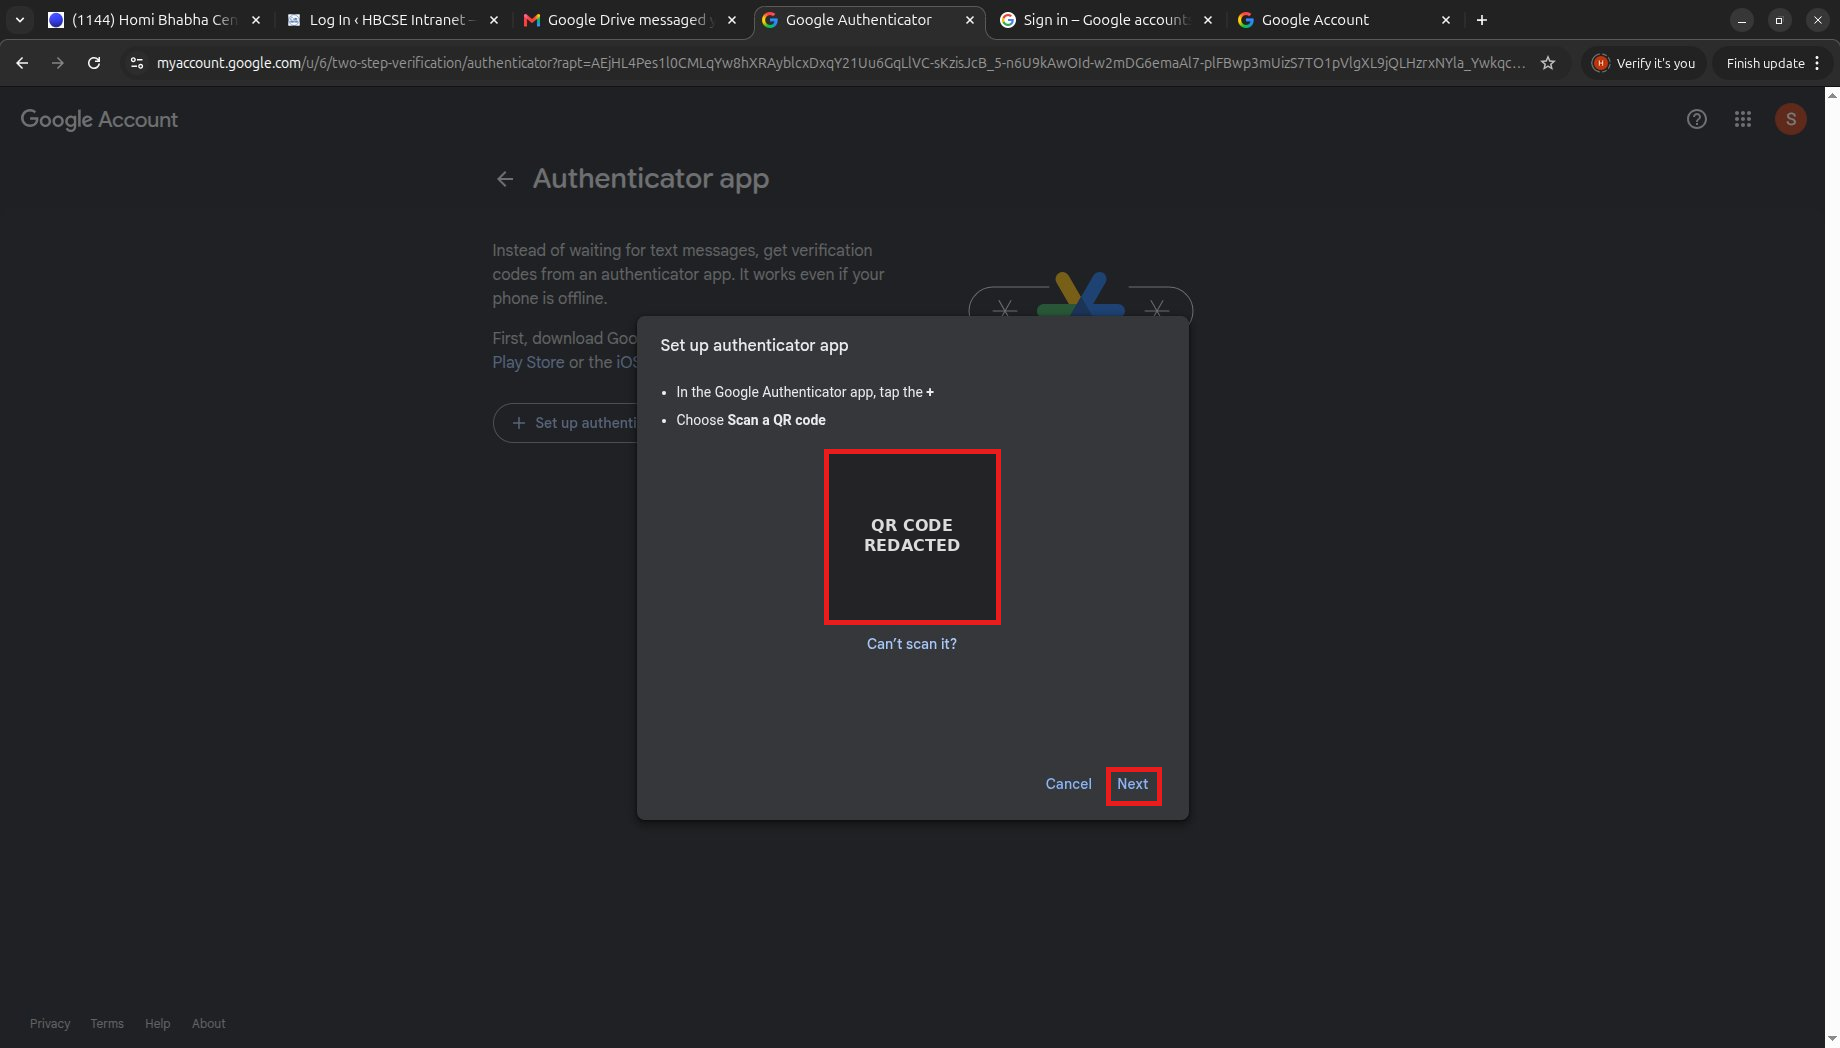
Scan the QR code
Open the Google Authenticator app on your phone, tap +, choose Scan a QR code, and scan the code on screen. Then click Next.
Step 15
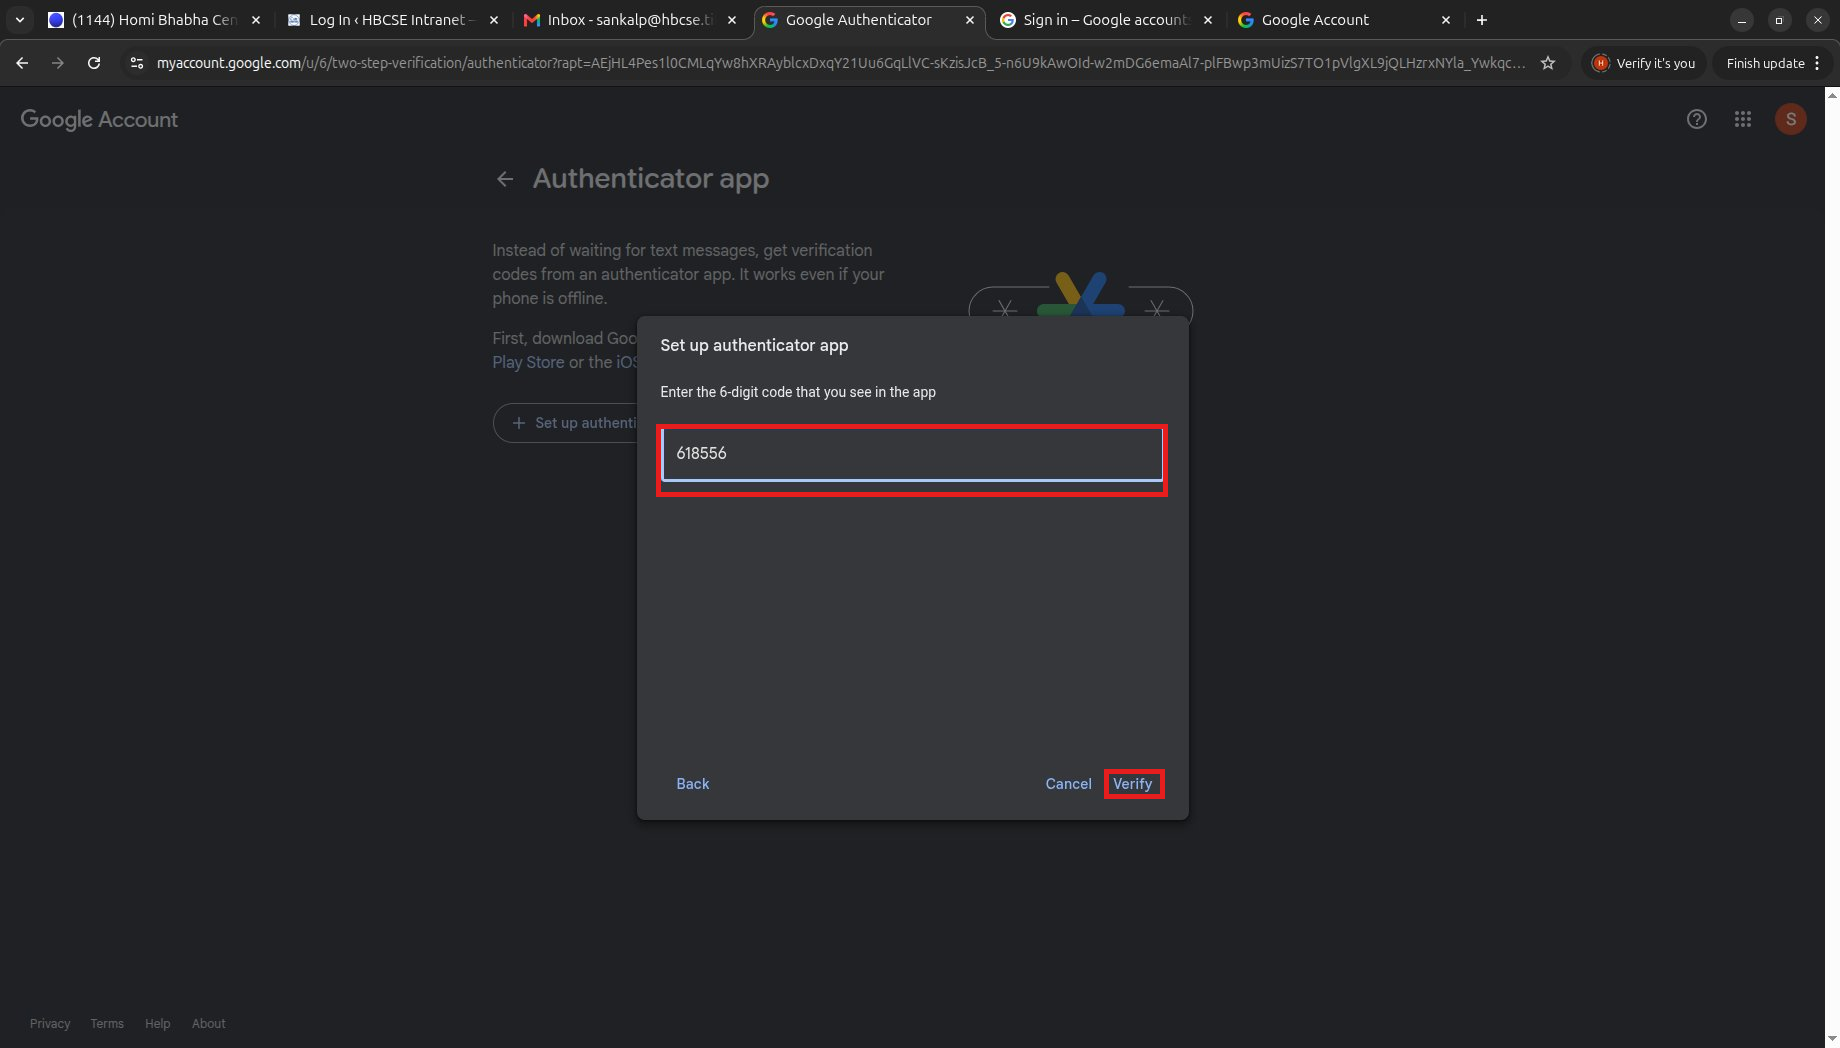
Enter the 6-digit code
Type the 6-digit code shown in the app and click Verify.
Step 16
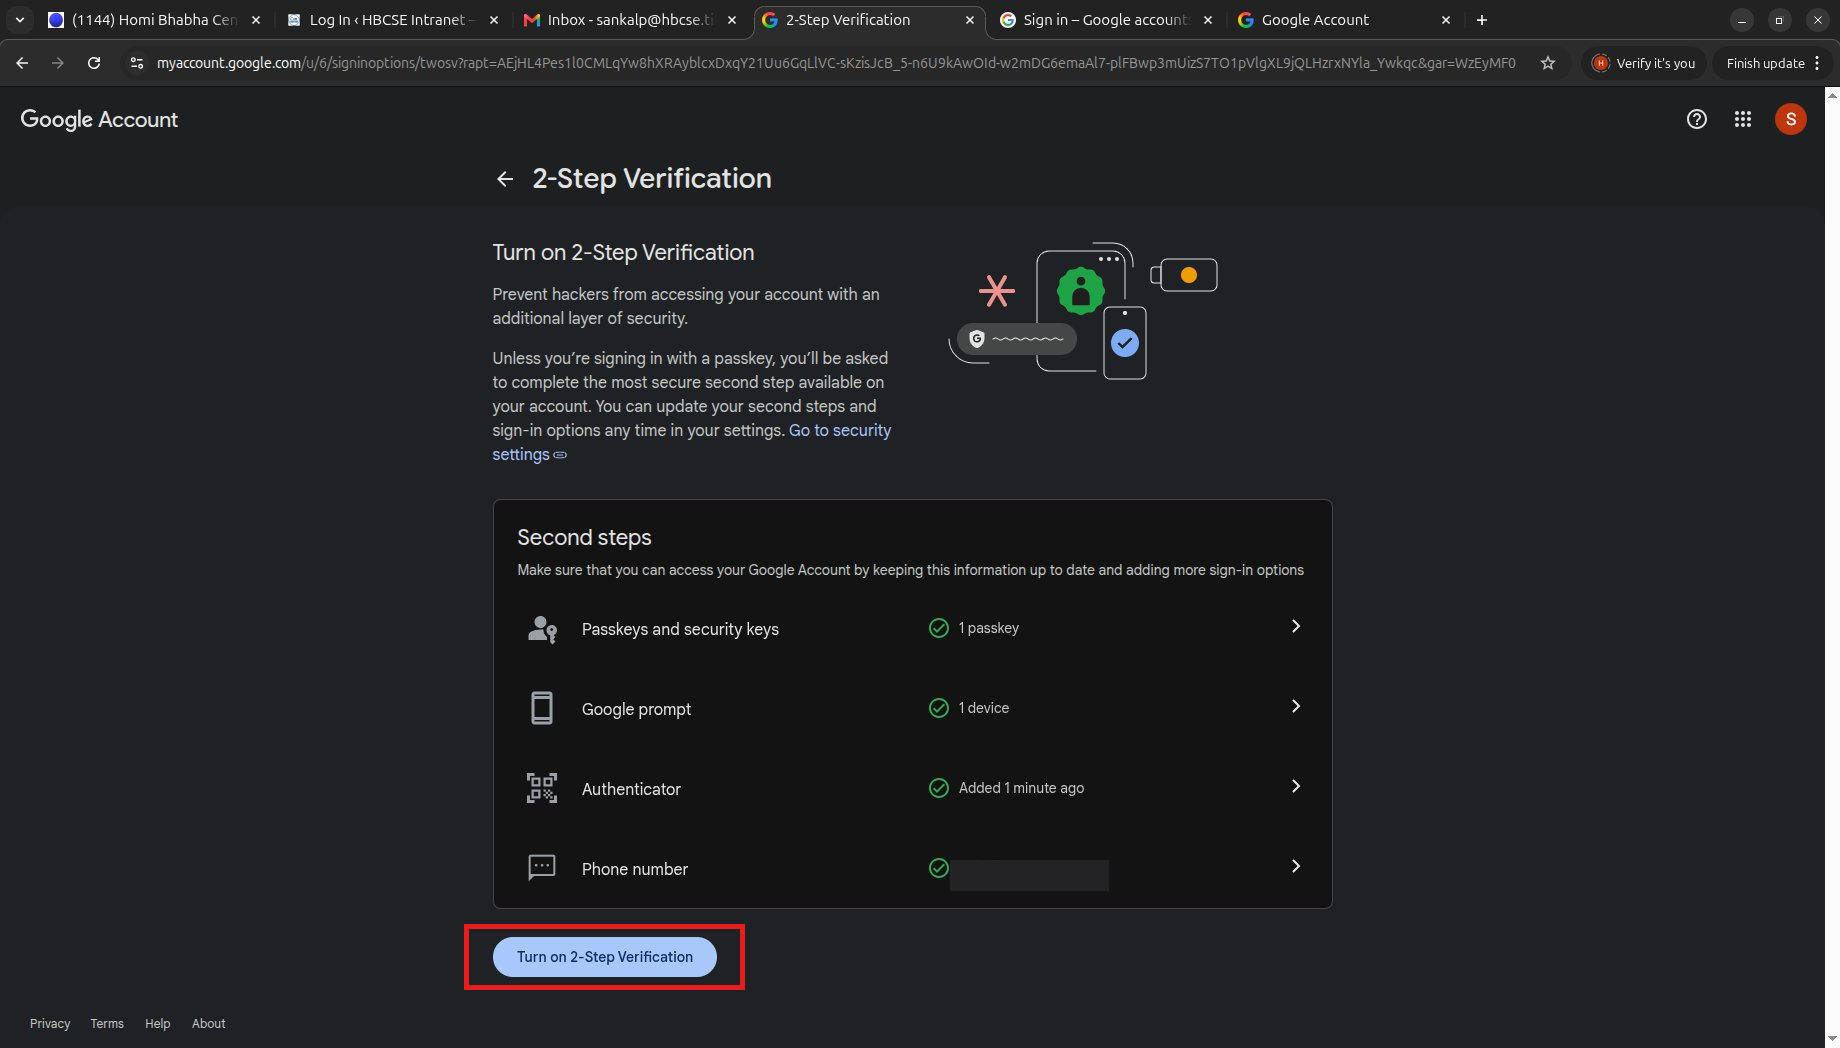
Turn it on
With the authenticator app added, you can click Turn on 2-Step Verification.
2-Step Verification: mobile number
Steps 17 to 25. Add your phone number to receive verification codes.
Step 17
Open the account menu
Once you’re in your inbox, click your profile circle in the top-right corner.
Step 18
Click on Manage your Google Account
Step 19
Go to Security and sign-in
If it asks you to enter your password, enter it and click Next.
Step 20
Click on 2-Step Verification
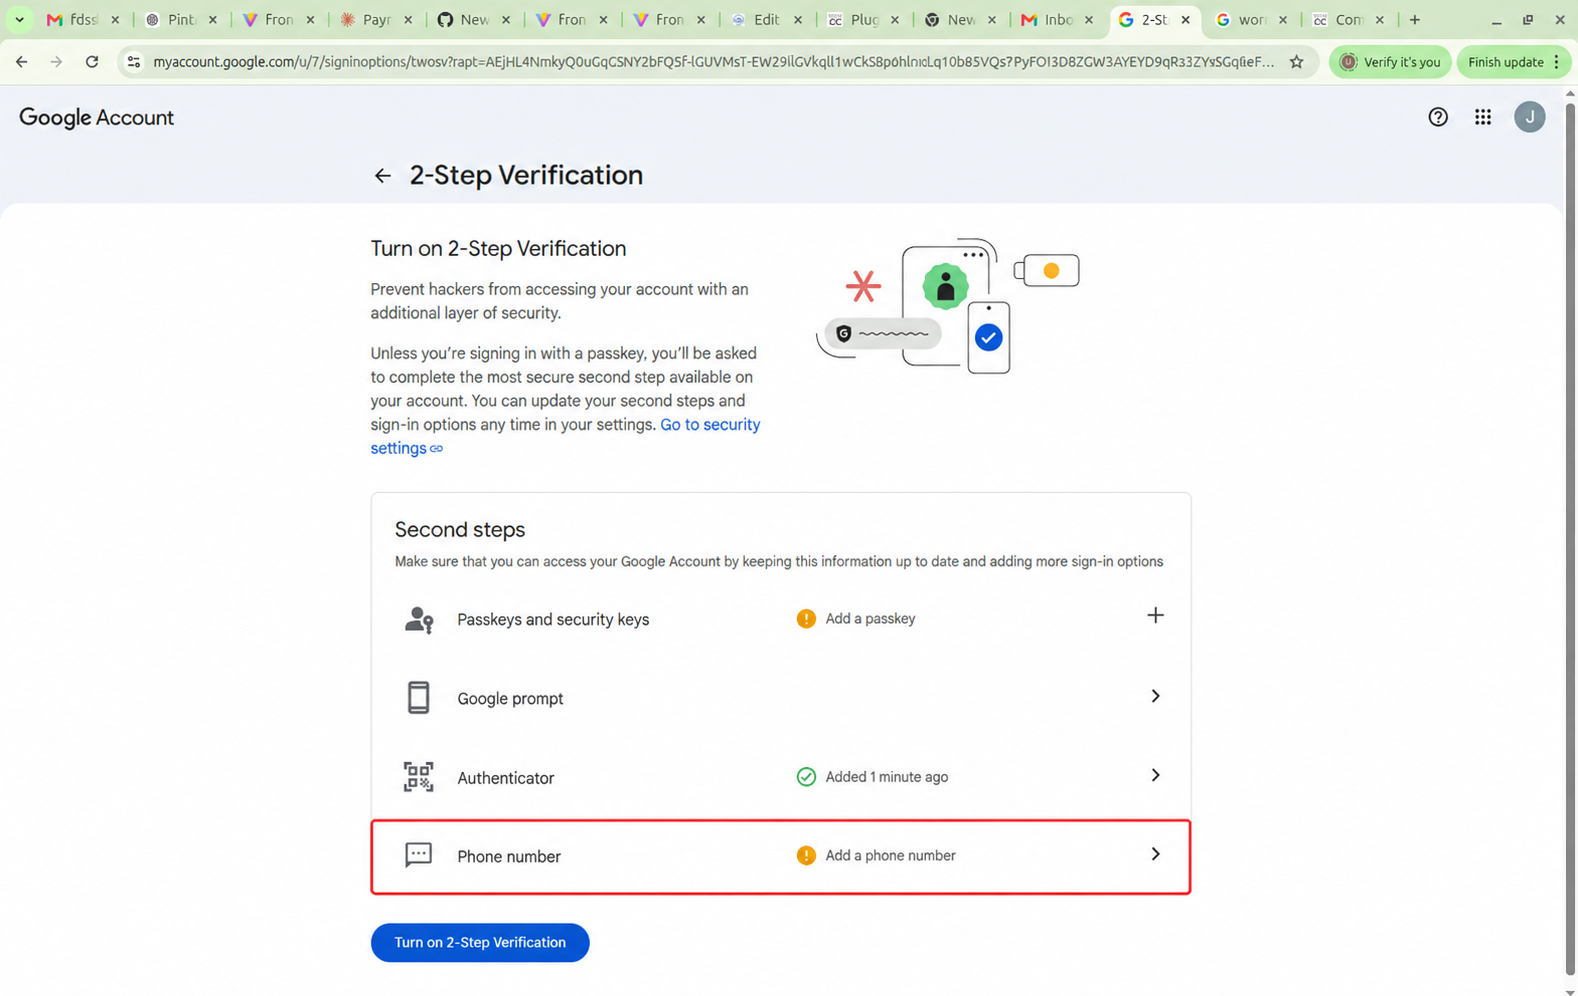
Step 21
Click on the phone number option
Step 22
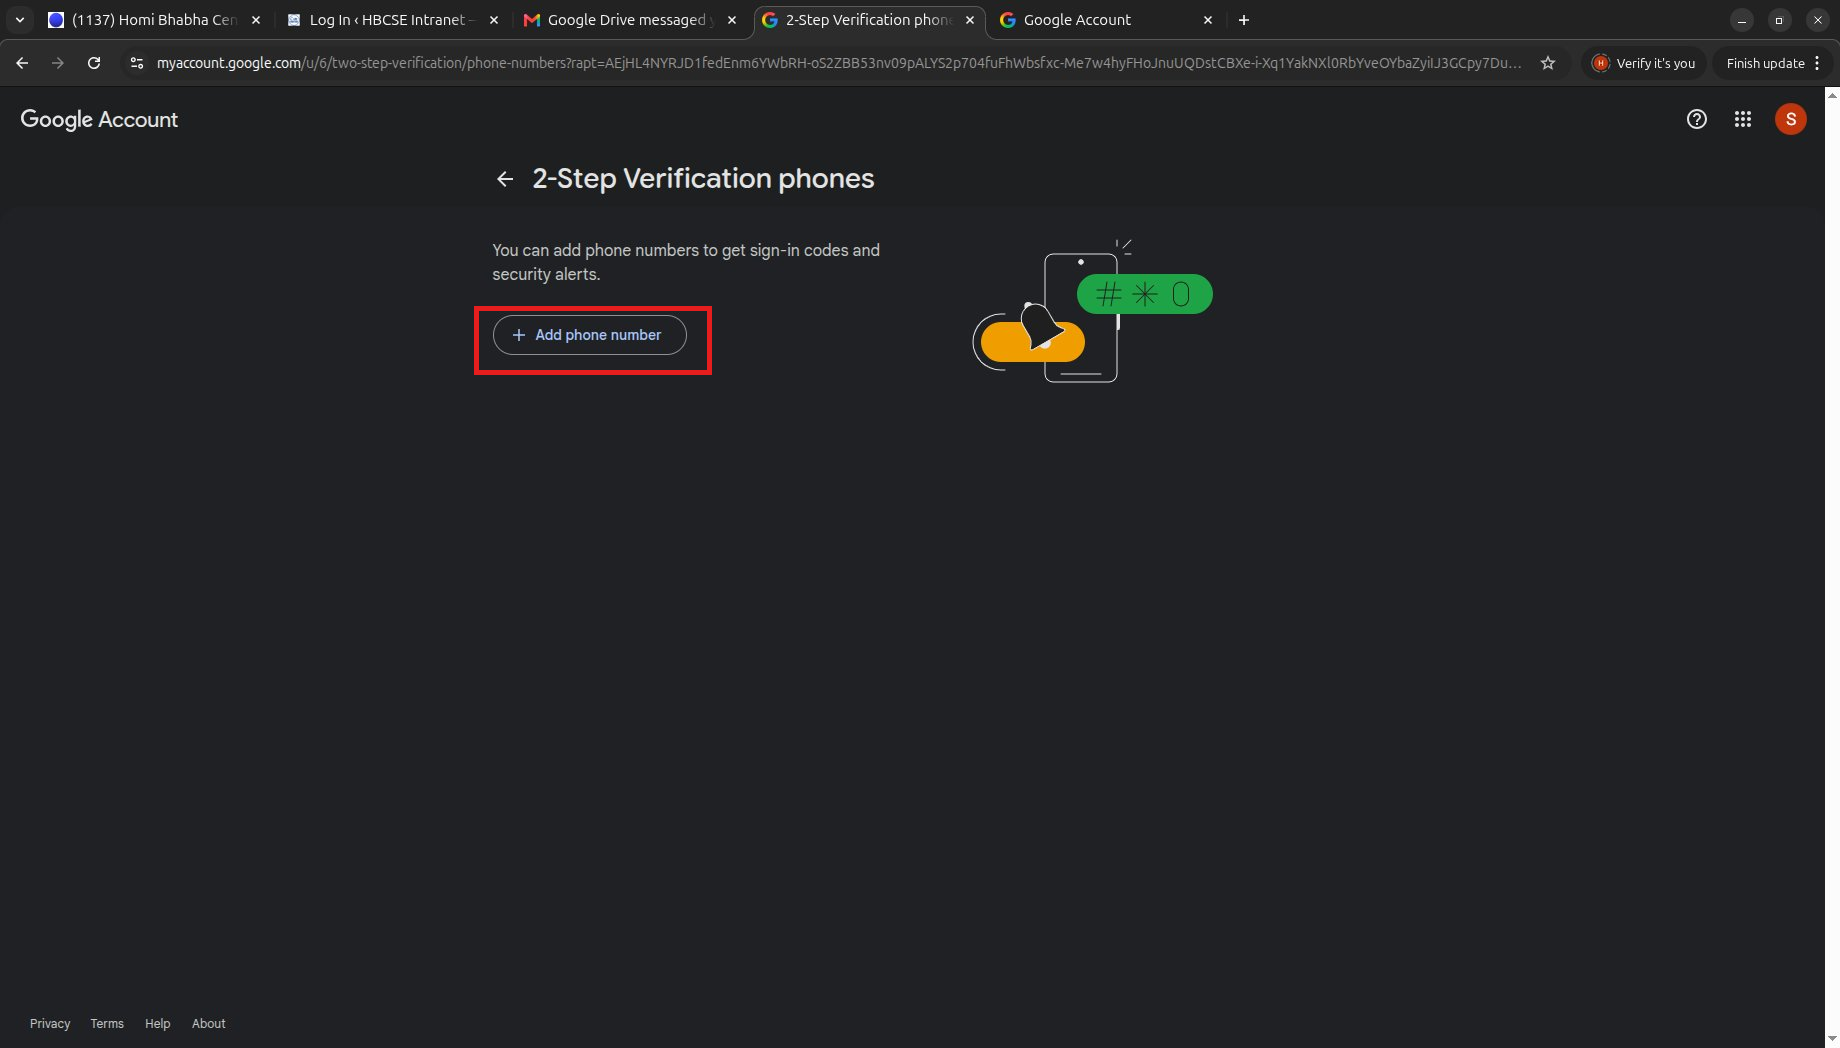
Add a phone number
Click Add phone number to add a way to receive verification.
Step 23
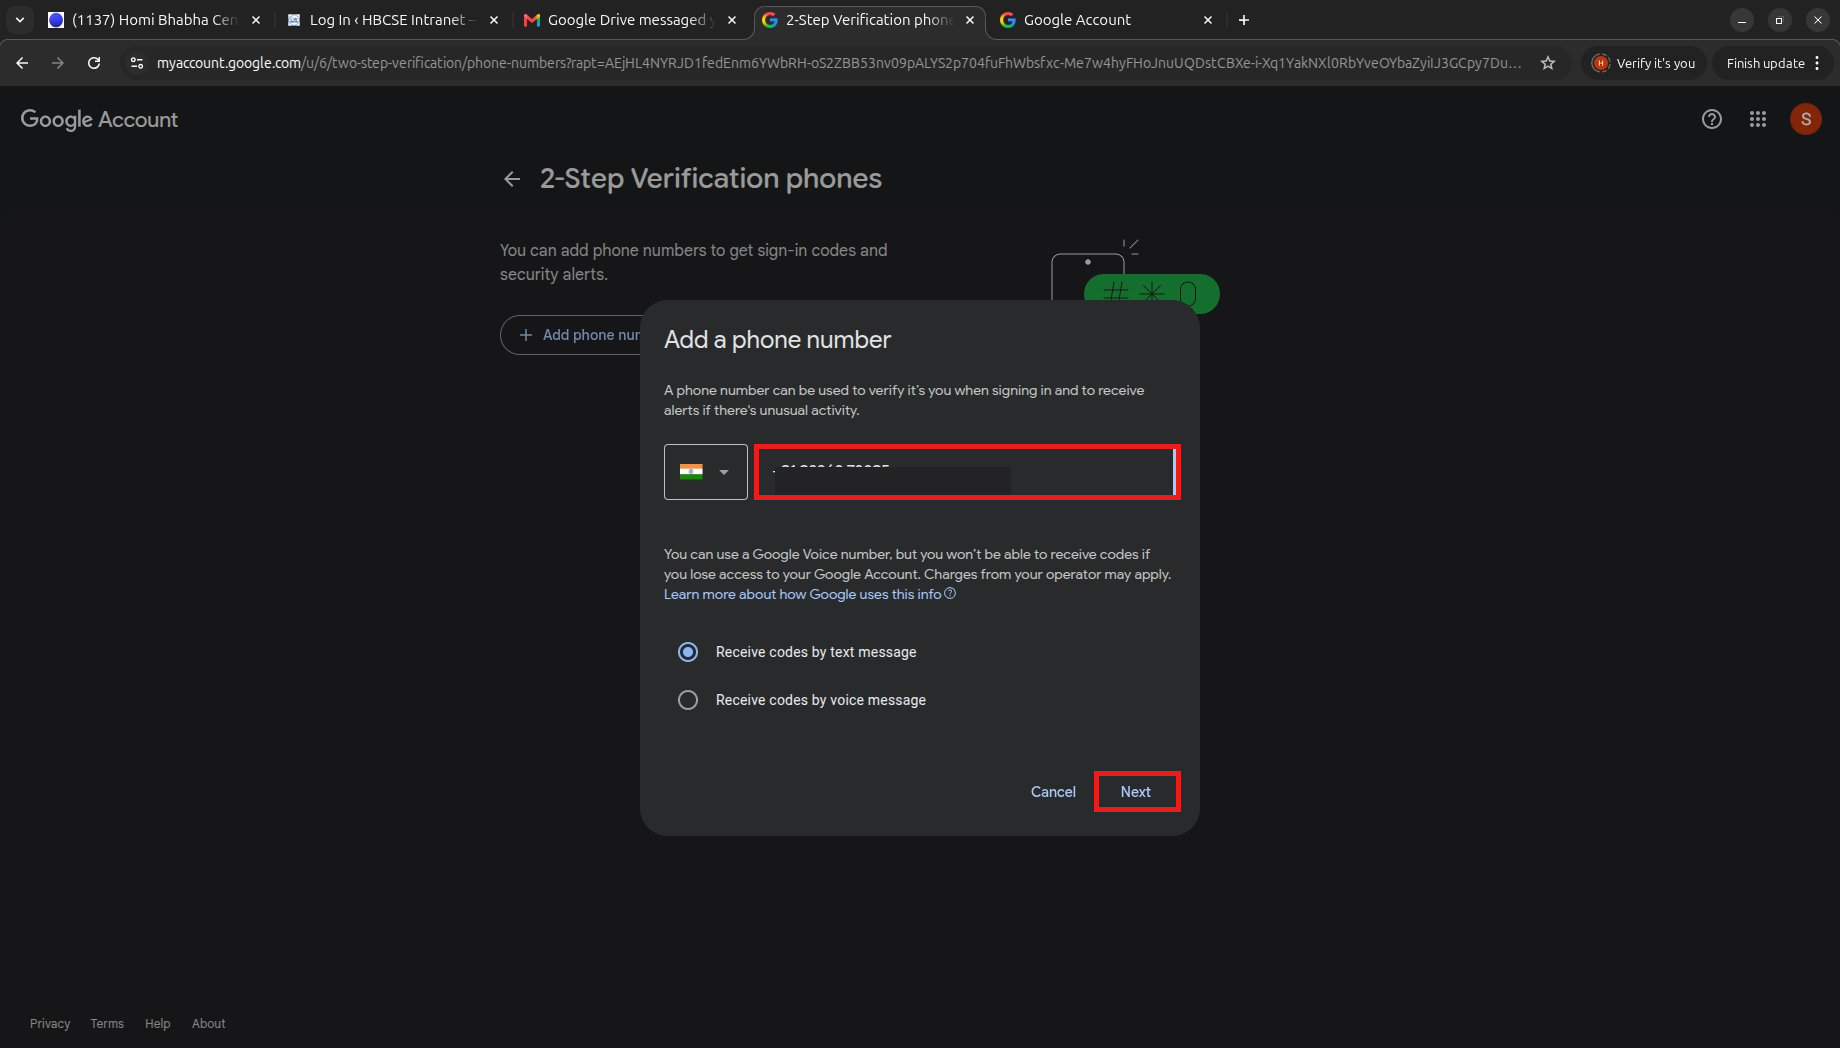
Enter your phone number
Type your phone number, choose how you’d like to receive codes (text or voice), and click Next.
Step 24
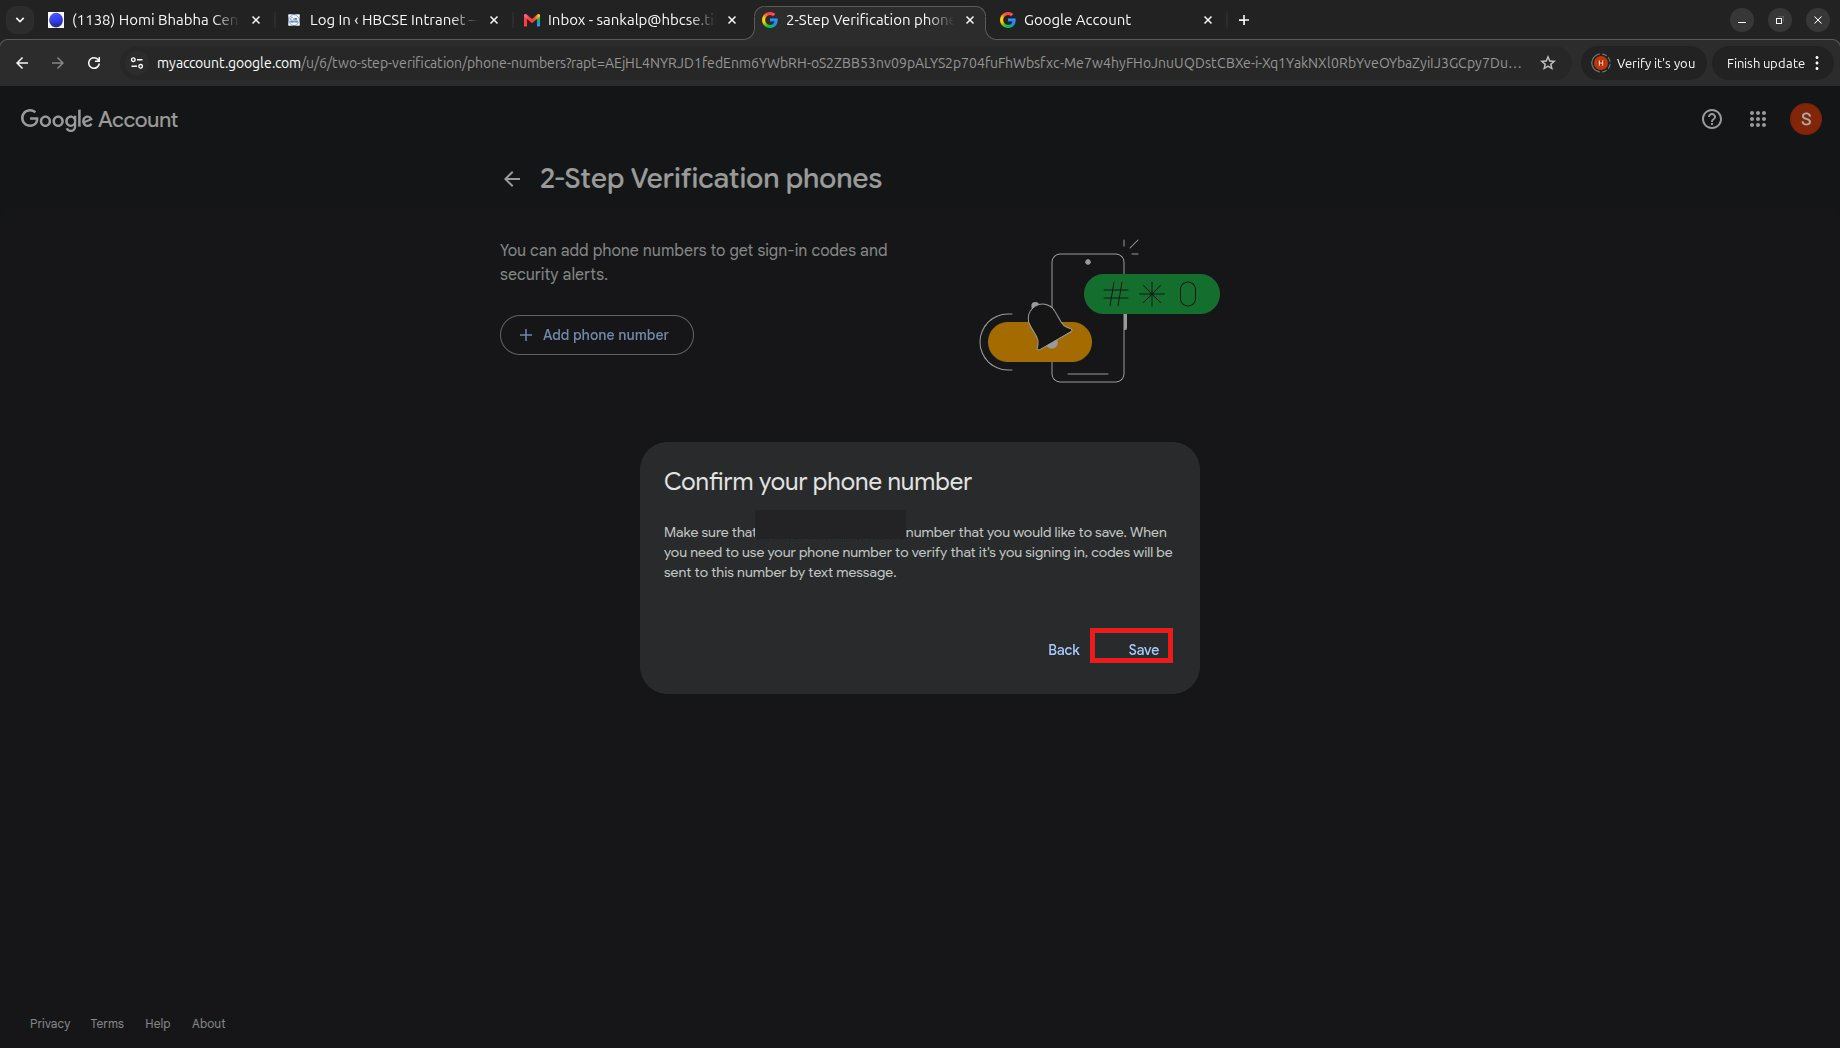
Confirm and save
Check the number is correct and click Save.
Step 25
Turn it on
With the mobile number added, you can click Turn on 2-Step Verification.